Monday, January 24, 2022

What's in your Genes?

 Believe it or not!!...

Quilters DO have other hobbies!

There are other interests and sometimes they happily cross over.

Some quilters have other crafting interests such as hand or machine embroidery, scrapbooking, painting, and the list goes on...  Some are into gardening, photography...and I often find that whatever it is...it compliments their quilting interests.

This one I wasn't quite expecting. I dabble in family history...genealogy.  Haven't given it much attention in the past few years as I have come to the end of the trail where a few branches are concerned.  

Just browsing through YouTube the other day, a suggested video caught my eye.  It was about using Google Books for genealogy research.  It was a very interesting discussion.

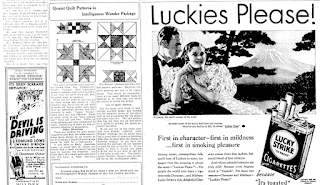
Looking through old newspapers, look what I found!  Suddenly I'm off on another rabbit chase...for old newspaper clippings with block patterns!

Edwardsville Intelligencer, March of 1933


If you are interested in genealogy as well and would like to watch Lisa's YouTube about how to use Google Books, here's the link:

https://youtu.be/-rgWwuJ5dG4

How did your other interests lead you back to quilting?


Have a great week!

KK

Monday, January 10, 2022

January Organization


It seems that it happens every January. It's a new year. Everyone's into making resolutions, choosing their word(s) for the year, cleaning out the old and making room for the new. Blogs and YouTube are full of organizational videos.

Last year, I vowed to complete a stack of quilts.  All UFOs.  Some needed to be quilted and some just needed binding attached.  I can say that I did wrap some of those up succesfully.  Finding time to sew for yourself can be difficult when you run a business of sewing / quilting for others.  Some projects still remain, but I count it as a resolution met...if only partially.

I started a Bonnie Hunter Mystery Quiltalong at the end of last year.  #RhododendronTrail   I do this every year, it seems, and then after a couple clues, I give up.  I keep the pattern clues thinking that I may get “around to it” but always find an excuse to fall out completely.  I don’t have the right colors.  There are too many pieces.  It’s tax time and I really want to get the books done.  Or there’s a new class I am trying to develop.  The latter two excuses always win out.

This year, I am making a valiant effort to clean out and clean up my sewing studio.  It seems there are scraps of fabric and projects left unfinished every where.  Bonnie's quilt is helping empty some bins.  At the same time, my sorting and getting things put away is refilling my scraps.  I may have to revisit her older challenges!

I've been following a challenge by Just Get It Done Quilts. Karen Brown has some good tips and reminders that I “just need to get it done!”  View her Declutter Challenge here:

https://youtu.be/7U8537FQMpI

Day seven was all about threads. Boy, could I relate! Karen talks about threads that have been around in our cupboards forever. Threads that we've inherited and threads that we have no idea where they came from.


I have this tub of threads that I've been meaning to go through and toss out all the strays. And this seems to be the opportunity to do just that. I figured if I turn this into a blog post it might inspire me / shame me by making it public to finally go through and sort out the things that just don't belong and I'm never going to use.

I'll bet you have a tub or a drawer just like this one!

First, that zipper doesn't belong.  I have another tub for those.  And 70 cents?  How long have I had that??!

THE HIT LIST

Most of these I am sure came from my Grandmother's collection or I have had since I first began sewing.  Either way...it's too long!

  • I spy a Ben Franklin price sticker...gone!  Yes, the store AND the thread!
  • Empty spools.  wooden spools...well maybe for a decorative jar of antiquities!
  • Girl Scout patches that never got sewn on my daughters GS vest.  How did those get there?  Good intentions, I guess.
  • Unmarked foam spools that probably came with a long ago used up or discarded sewing kit.

Yes, unfortunately, many of these soldiers ended up in the bin.  The box will be re-purposed and re-labeled.

Did I inspire you to do the same?


Friday, October 26, 2018

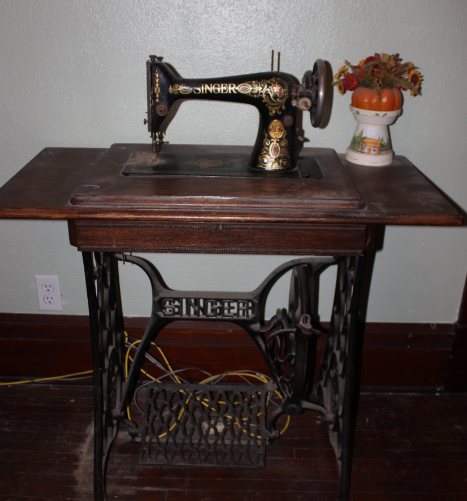
One hundred and sixty some years ago singer introduced a household treadle sewing machine. Since then sewing, quilting, and embroidery has come a long way.

Recently I began backing up the huge library of photos that I have converted to digital files. I am using the new Google photo tool library to store digital photos in the cloud. You've got to try this! Google offers and unlimited storage. And I didn't know how many photos I really had.  Looking through them recently I found photos that I totally forgot I had.

I found photos of my grandparents and their new farm north of town and a very young family. Pictures of my grandfather farming with their two horses reminded me of how far farming technology has come.

Both of my grandmothers quilted and used very primitive means by today's standards. They quilted at home and with groups of other women at church. Today I am participating in a quilting mystery with women all over the world. How times have changed!


If you're interested in all things modern and computerized sewing and quilting, I have a new blog just for you. The Digital Quilting Bee talks about computerized quilt design, quilting and machine embroidery digital creation, and long arm computerized quilting. I'm a quilting geek at heart and love anything  that I can create on the computer, share with others, and create something fabulous. Join us!

Friday, March 23, 2018

Pre-school to Quilting

Pre-School Scribbles to Free Motion Quilting


A news story yesterday gathered my attention recently. It was a local piece about a young lady who had won a handwriting award from a national society. I can't remember seeing an award such as that recently or maybe it's just not reportable anymore. There has been buzz lately regarding how cursive writing is no longer taught in schools. It is one of the archaic subjects the educational gurus feel we no longer need.

I beg to differ and see handwriting, cursive in particular, as one of those necessary subjects. Sure we're all on the computers these days and keyboards have taken the place of our scribblings on paper. We jot down the grocery list on an App on our phone or talk to Google or Alexis to remind us to buy milk, toilet paper, and eggs. But in order to fully communicate with each other, it is necessary to put into writing, or to put down on paper, our thoughts, feelings, and expressions. It is also necessary to be able to read the communications from another. Receiving a hand written letter still can't quite take place of an email or a text message.

The very performance of handwriting trains our brain to move our hands in a particular direction. It requires the firing of those little neurons to move the muscles in our hands to perform a ballet of swirls and swishes to create sensible scribbles of communication.

As quilters, handwriting is transformed into our quilting motions to create free-form designs for our finishing stitches applied to our quilt tops. In teaching free motion quilting, I often start new quilters with what they know – writing their name in cursive. It is the motion they are most familiar with. So that leads me to the subject of the next string of blog posts. We're going to talk about free motion quilting on a domestic sewing machine or long arm. You can be a beginner or more experienced quilter wanting to improve their free motion quilting skills.

So grab a notebook with plenty of paper and sharpen your pencils. Were going to brush up on our cursive skills and who knows, maybe you'll be up for a handwriting award next year!

Tuesday, January 31, 2017

Game Day Mug Rug in Art and Stitch Plus

There's going to be a "BIG GAME" this weekend!  Have you heard?

I whipped up this mug rug design in my machine embroidery digitizing software.  Yes, you might ask me for the FREE design if you don't have embroidery software.


Check out the video (and other videos) on my YouTube Channel.


Happy Sewing!


Wednesday, January 18, 2017

Part 2-Purchasing an Embroidery Machine

So we discussed some things to think about when you set out to buy a new sewing machine.  Now let's talk about another option.  Maybe you've seen some fun things done with an embroidery machine.  Monogram on towels are great, but there is so much more.  But hold on to your hat!  Like starting up any new craft, it can get expensive quickly.

It may have crossed your mind that this may become a business.  Again, do your homework before jumping in with both feet.  An embroidery business can be rewarding, but it does require investment of time and money.  Let's talk about embroidery as just a hobby.

First, deciding on a machine.  Again-lot's of choices.  And if you have NO experience, you'll want good support AFTER the sale.  Is the support within an easy travel distance?  You will probably have to take your machine and all your supplies to a class. You can take embroidery classes, but machines can vary with functions.  You'll want to learn on your machine.


Capabilities of the Machine.
Hoop Size
The more affordable machine may only have a maximum hoop size of 4x4 (inches).  That will be fine for the majority of designs out there.  But then comes that one design you find (that you have to have) that won't fit inside that hoop.

Someone says, "Oh, that's easy!  Split the design!"  Well, yes and no.  You will need to buy software to split the design and then have the skill to re-hoop your project and re-align the design.  There are some re-positionable hoops that assist with split designs without re-hooping, but that's another purchase.  (Beginning to understand why we need to think this through?)

Machine Communications
There will be some designs (and maybe letters or fonts)  included with your machine.  They are installed.  But you will need to get other designs (whether purchased or downloaded) to your machine.  Some machines require a direct hook-up to your computer, or designs can be transferred via a thumb drive.  Older machines may have a "card" option. This option requires a "card writer."  Yes, another option and purchase.

Software
Depending on the machine you select, some design editing can be done by the machine.  Changing machine formats (not all machine brands speak the same language), enlarging a design, monogram designs, changing thread colors, combining or splitting designs, and digitizing (creating) your own designs are just a few things that software can do.

Here, again, there are lots of choices.  And many have free trials.  I encourage you to try them.  You most likely will not be able to save any work.  You will just be able to play and explore the capabilities.  And you should have some computer knowledge.  Some programs will work with Macs as well as PCs.  Some will not.

And, I assume, since you are reading this, you have a computer.  You need a computer.

Threads, Needles, and Stabilizers

Yes, there's more to buy to get started.  They are all necessary to get a good sew out.  It's another big subject - too many variations to get into here.  Just put it on your shopping list.

My intent is not to discourage or dissuade you from wading into the "embroidery" pool.  Just don't get in over your head.  Embroidery can be so much fun and very rewarding. I want to see you enjoying the processes and not frustrated by them.

If you missed our previous discussion about starting the sewing machine purchase process, click HERE to begin.

Want to know more?  Just ask...

Happy Sewing!
KK

Friday, January 6, 2017

Purchasing a Sewing Machine - Things You Should Know

So you have decided to purchase a sewing machine.  And it's overwhelming - the choices available.  Let's break it down and look at what this all means.  Today, more than ever, there are so many choices.  It can be confusing and you may be left frustrated after your purchase without carefully considering your options. 
I don't want you to have a machine, in the box, occupying a corner of your closet.  You could just pile your money there right now if that's the case!  We don't want that!  So let's get started!

First, what are your needs and requirements?  And what is your budget?

Is this your first machine?  Or are you replacing a sewing machine - maybe the old machine isn't working (too expensive to repair)  or you are wanting to upgrade?
What do you sew?  Or want to sew?  Will a simple mechanical machine with a straight stitch, or a few zig-zag and button hole stitches, fit the bill?  Will you require more decorative stitch features?  Are you wanting to try some machine embroidery?  

Wow!  That was a lot of questions! Let's try some answers...

A simple machine will do...
Ok.  Do you need new?  Or will a vintage machine do the trick?  Second hand stores, auctions (estates, local and on-line), yard sales, church rummage sales, basements, barns, and even back alleys are full of inexpensive quality machines that still have years of service left in them.
Look for a clean, rust free, model with no cracked wiring and a hand wheel that turns freely.  Accessories and a manual are a bonus, but bobbin case, power cord and foot control are a necessity.

If this is your first machine, or you are new to sewing, and you are NOT feeling particularly adventurous, I WOULD NOT suggest you purchase your machine from Amazon or Wal-Mart.  The UPS man or the guy in tires will not be able to help you choose a needle for your next project or solve that tension issue.
Look for a local sewing center or quilt shop that may offer classes and knowledgeable staff.  And be sure to look for or ask about that support BEFORE you purchase.  If there is none, move on!  Yes, you might pay slightly more, but chances are that, if any difference, it will be recouped and worth the slight extra.

WORD OF CAUTION!  Trucks that pull up in a parking lot with "Classroom" machines, machines that sew leather, or are a "Serger-Combo" ARE NOT a good buy!  Your money and support drives off into the sunset when they pack up and leave the parking lot.  These guys are kind of like the vans that drive around your neighborhood with a load of great buys on meat!  Sketchy!

I've never seen a nice, well loved Home-Ec Classroom machine.  They have been abused by teenagers, and have broken or missing parts.  And really, where are these school that still offer Home-Ec?
Any machine will sew leather depending on weight of leather and if you use a leather needle.
"Serger-Combo" refers to an attachment.  It is a foot with a cutting attachment that does not cut very well, and guarantee you will want to throw it at the guy who sold it to you.  The machine sews a stitch resembling a cover stitch.  But Sewing Machines and Sergers are two different animals.


Final words.  Sit down and drive several brands.  Some sew smoother and quieter. Some will sew faster.  Find the model and brand that meets your comfort level.


So this is getting long.  Lots to digest.  We'll continue tomorrow with Part 2 - Buying an Embroidery Machine.

Happy Sewing !
KK


Monday, January 2, 2017

Fresh New Year

I haven't seen quite as many news stories this year about New Year's resolutions.  Maybe we're just so happy to put 2016 behind us.  It was quite a year.

I have seen the sales, though, on items that are going to get us organized!  Not falling for it.  Plan to use up or continue to purge my ginormous stash.  And that's not to say I won't buy anything new.  There's always another "pretty" out there.

This is not MY stash, BTW, just a picture from Facebook that I hope I never resemble!  Something to show my DH that there are real hoarders out there.  I, happily, am still an apprentice!


Have my eye on Alex Anderson's new line from RJR due out in April.
What can I do with this?  Just love the colors and have a lot that will work with this.  Can hardly wait.  Something will come to me...about 3 A.M.  That's when my brain come up with it's great ideas.  Guess it's too distracted when I'm awake and need great thoughts.


So what are you up to during these dreary winter days in the Northern Hemisphere?  Lucky, Aussie's and New Zealander friends.  You are in the warm, sunny days of summer.
Drop me a line.

I'll be working on some upcoming happenings for 2017.  So stay tuned.......

Happy Sewing
KK


Friday, October 21, 2016

Block 3 - A Little Birdie Told Me - Be My Neighbor

Applique can add beauty, or a bit of whimsey to a quilting project that piecing or creative quilting design cannot match.

Of all the the techniques that I have taught over the years, applique seems to stir fear in the hearts of my quilting students.  Never have really understood why.  Maybe it's the four-letter word - "hand." Applique is best known to be done by hand, but can also be achieved by machine.

Block 3 in our Neighborhood Sew Along has a sweet little bird sitting atop the roof singing a tune, I'm sure.  To encourage you to give applique a try, I have a couple tips and will show a couple ways to achieve success.

Option 1 - Finished Edge Fusible Applique

You will need Lightweight Fusible Interfacing and a pen or fine tipped marker. Trace the needed shapes on to fusible.


Next roughly cut apart pieces, placing them with coordinating fabric.  Leave at least a 1/4" margin around all pieces


With right sides together (right side of fabric and bumpy-fusible side of interfacing) sew interfacing to fabric following drawn lines.  Cut out shapes leaving a narrow 1/8" margin.


Cut  small slit in the center of interfacing being careful not to cut fabric as well.  Sharp, pointed scissors are best.  

Using that wonderful chopstick (we talked about in previous post) carefully turn the pieces right side out.  Use the chopstick to aid in turning and pushing out tight corners.


Since you cannot apply a hot iron at this point,  use the flat edge of chopstick and the heat from your fingers to press edges flat.

Here are two pieces of the bird.  You would next place the pieces on the block and fuse them in place according to interfacing instructions.  Then tack in place by hand or machine.

Because the edges are finished or turned, it gives more of the appearance of being "hand" finished.  It also gives "lift" or a 3-dimensional look to your work.

But we have some really tiny pieces with this project, so not all can be accomplished with this method.  The tiny beak is just too small to turn.

So let's look at my favorite method.....


Option 2 - Raw Edge Applique

This method requires a double sided fusible - like Heat N Bond or Steam A Seam Lite (I carry both).  Again trace pattern pieces on the paper side of fusible.

These fusibles have a paper and a fusible side.  When you fuse it to the backside of fabric, allow to cool, you can remove the paper backing to reveal a second fusible side.  This fusible side is slightly tacky (like a Post-It Note) and helps with placement.


 Roughly cut pieces apart, leaving margins and place on the back side of appropriate fabric.


Take pieces and fusible to ironing board and fuse to backside of fabrics.  Allow to cool and then cut shapes on drawn lines.  Remove (peel) paper backing off.  If you are having trouble removing, bend a corner back or pop up with the point of a pin.


Next apply pieces to your block. When happy with placement, iron in place.  Pieces CANNOT be moved or removed easily so be sure you have it where you want.  Use that chopstick again to move or place small pieces.

Pieces can be secured with machine stitching.  Work on a sample scrap trying different stitches on your sewing machine and don't forget to adjust both stitch length and width. You may choose a tight narrow zig-zag, a blanket or blind stitch, or a simple narrow topstitch.  Choose whatever you find pleasing.  I choose a blindstitch.

 Here's a little BlueBird for my block.  I didn't add a eye yet.  Maybe a button or bead when the quilt is finished.


Happy Sewing!
KK


Friday, October 7, 2016

Block Two - Be My Neighbor


Are you having fun?  I have loved diving into my scraps, pulling out a bit of fabric and remembering when and where I used this fabric, friends I may have been with, or the lucky recipient of something made with love.  Brings warm and fuzzy feelings to be using the last bits.

Building Permits for Block Two went out early this morning. So let's get started.

Cut all your pieces according to pattern instructions.  And then piece together in sections.  There are two distinct buildings, so it is easier, I find, to build one at a time.


Two roofs which require those pesky Flying Geese.  The silo has a chimney - a neat little twist.


Have both my roof sections completed here.


And then there's all those HST's (Half Square Triangles).  They can be a bit tricky if your seam size strays North of a quarter-inch.

But there's a solution....


If you find that your HSTs aren't quite measuring up to size, cut your squares a little larger.  Draw the diagonal line and sew either side of line like normal.

Cut apart and press open.

Get out that square-up ruler.  Align the diagonal line on the ruler with the seam of the square as pictured.  Align with the measurements of square required and trim away excess.

Making your HSTs over-sized assures that you will have perfectly sized HSTs.
And that's it for this week.  Wasn't that fun?

Happy Sewing!
KK


P.S. Don't forget to SHARE your pics!


Monday, October 3, 2016

Five Weeks Til Christmas


Block One is out today.

This quilt was inspired by a pattern by Kate Spain called Solstice for Moda Fabrics.  I have adapted it for another Moda fabric line from Sandy Gervais called Very Merry.  I have added different borders and prepared instructions for multiple sizes.
You are welcome to use your own color / fabric adaptations.  If you wish to use our fabrics, Kits will be available at our website - KK's Quilt Studio.   


For Block One.  If you would like to make:

Bed Runner (34 x 106 inches) - Make one Block
Throw/Lap Size (70 x 70 inches) - Make one Block
Queen Size (88 x 106 inches) - Make six Blocks
King - (106 x 106 inches) - Make five Blocks

There are several Flying Geese in this block.  I HATE all those extra little triangles that usually get trimmed away.  Just a waste.  So I am all about the No Waste Method of making Flying Geese.  It may even make you love making Flying Geese.  I used to avoid them - passing on patterns that had them.

First cut one large square (geese) and four smaller squares (sky).  Measurements depend on finished size.  I have a handy chart I saved from somewhere - can't see to find where - but Dani Fisk - this is yours, Thank you.
Right Click on picture to save.

Moving along.  Draw a line corner to corner on all your smaller sky pieces.


Place two sky pieces on larger goose as shown below and sew a scant 1/4 inch away from line - both sides.


Cut apart on drawn line.  Press open.  Yes, they look like little kitties!


Place last two squares on these "kitties!"
Repeat sewing either side of line and cut apart.  Trim away all those little dog ear corners.

You are almost there.  Press open again and voila!  Four Flying Geese almost like magic before your eyes!  And virtually pain free!


That's all for today.

Happy Sewing!
KK

Thursday, September 29, 2016

SPIDERS....Oh My!

Every where I look, my yard is filled spiders and their webs.  They've been there all summer, but it seems as fall approached they kicked up the "decorating" to full gear!


Working on the Be My Neighbor Sew Along has been great.  Bags, baskets and drawers of little bits, strips, and fabric ends have been hiding in the corners of my Studio and under my cutting table reproducing - I'm almost positive!  Well it's time to clean the cobwebs!

It's been on my bucket list - a string quilt.  So the spiders have inspired me to get started on the spider web block.  This is a foundation piecing block.  And I'm always looking for another way to use a ruler.


I pulled out my Cozy Quilt Designs Strip Tube Ruler and the EZ Dresden Ruler.  (Both are available on my website if there are not already in your arsenal.)


The is a recycling, Use-It-Up project, so I dug into my computer paper recycling bin as well.  Use scrap paper for a foundation for the strip piecing.  With the Strip Tube Ruler as a template, I can get two triangles from an 8-1/2 x 11 inch sheet of paper.

Yes, a corner is missing, but there's enough to get the job done.  I do not want to put a seam any closer to the corner because of bulky seam issues.
 Using the center line of the ruler, make a small mark indicating the center of the long edge of the triangle (the hypotenuse for all you math geniuses!)


Draw a line from that mark to the corner.


Do the same for both triangles on the page.


Cut the sheet in half.  Make lots more.

You can use scrap computer paper, old catalog pages, or newsprint, even old phone books.


Just make them all the same size.

Make as many foundations as you have scraps, or as big a quilt as you want.

I always go BIG and have A LOT of scraps and this will be an ongoing project - so stay tuned.


Next use you EZ Dresden Ruler to cut the center "kite" pieces which will form a star. These pieces will all be white or off-white / cream pieces.  Cut 8 inch wedges.  If you have a large enough piece of fabric, cut an 8 inch strip and cut wedges as shown below, flipping the template as you go.  (Cut your pieces 8 inches, not six as in the picture.)


Let's go to the sewing machine.  Lower the stitch length.  Tighter stitches will make it easier to remove paper when completed.
Center a "kite" on the center line of paper foundation right side up.  Place first scrap strip face down.

Seam width is not as important, but try to stay 1/4 inch along aligned edges.

Stitch.

Flip strip.  Press.  Repeat.


Keep adding strips until paper foundation is covered and looks something like this..


I know, it looks like a HOT MESS!  It gets better!


 Flip the pieced triangle over, paper side up.  Using your cutting ruler and rotary cutter, trim away uneven fabric edges.

Then it's looking a lot more like what we are shooting for!  And we did't have to do any strange math calculations.  Hurrah!


Here's two together!  Now only about 80 more!


So stay tuned.  I'll be working and the pile grows.

If you are one of those overachievers.......remove paper carefully so as not to stretch those bias edges.  Sew triangles together forming quilt top.  Quilt as desired and POST pics!

Happy Sewing!
KK


Tuesday, September 27, 2016

Tool Tip Tuesday

Not all sewing room tools are found on the LQS notions walls.

Today we'll look at sewing with small pieces or pointed piecing.


It's pretty basic.  Always have something under your needle.  Chain piece your projects - one piece following in after the other.  My Grandmother Stella new this long before I began sewing.  She had this small scrap of fabric that she ran through the machine at the beginning and stopped sewing on until it began to look like a very hairy spider!

Points tend to want to get pushed by the needle through the needleplate and all sorts of unhappiness begins as it gets tangled, jams the machine, and interrupts our sewing session possibly damaging the fabric.

If your machine head is portable, leave the spider in place.  Protect your sewing feet from damage or scratching by the feed dogs.  There should always be fabric between them.

Then there the matter of running the sewing machine with your fingers very close to that needle.  Another simple fix - go out to eat Chinese!

Grab an extra set of chop sticks.  Even if you can't manage to eat with them they are very handy to hold or guide small pieces of fabric through the sewing machine.

They are VERY inexpensive if not FREE and can be used for a multitude of small tasks.  Try turning that next applique project with a chopstick.  Great for pushing out and making nice corners.

Your long tweezers from your serger are also very handy.

Sew, that's it for today....Happy Sewing!

Friday, September 23, 2016

Block 1 Be My Neighbor Sew Along


You should have received your instructions for Block 1 this morning.  If you haven't signed up yet, there's still time.  Just send me your email (look to the right) or message me through Facebook and let me know you want to join The Neighborhood.

Patterns include cutting measurements and sewing instructions.  Colors and patterns are up to you as everything is in grey scale.  Let's see how creative you are!  Post your blocks and progress with the hashtag #ModaBeMyNeighbor

We got organized yesterday, so you should be ready to select, cut and sew.

Pick fabrics that will work and are large enough for piecing / measurements required.  Cut fabrics and organize in groupings as shown in pattern instructions.


This is the base of the tree and I sewed this unit, pressed and set aside.


I worked on the tree top next.  Cut rectangles and squares, and stack together.


For the tree top and roof of house, you are essentially creating a series of flying geese.  You can draw a diagonal line as given in the instructions.  I prefer to  eyeball it for smaller pieces using the blue tape line as a guide and extension of my center needle mark on my needle plate of my machine.
There are several tools out there to duplicate this effort.  This is what I find effective.


Two words of caution:
1.  Use only blue painters' tape or some low-tack tape.  DO NOT use masking tape.  It's hard to remove and either leaves a residue or will take cabinet or sewing machine finish right up with it!
2.  Sew to the outside of your line - the side you will cut away - just a smidge.  DO NOT sew on the drawn line.  Ask me how I know!


 You will not get a corner that folds back like this!  It should perfectly match the edge of the rectangle.  If it doesn't, unsew and try again.  Don't try to stretch it or squish it.
That's what God made seam rippers for!
Set the seam and press.


Next trim away the excess fabric from behind.  (you can save for another project if large enough-crumb sewing-blog post for another day ;-)

Do one side at a time.  Sewing, pressing and trimming.


Assemble all parts in units.  Units sewn to units.  Pin where necessary to ensure points align.


I fussy cut the flower pot for my windows.  And had to piece some fabric of the house.  Hey!  It's scraps - right?


And voila!  Block 1 is finished.  Only 15 more to go!

Here's the Schedule
Block 2    October 7th
Block 3    October 21st
Block 4    November 4th
Block 5    November 18th
Block 6    December 2nd
Block 7    December 16th
Block 8    December 30th
Block 9    January 13th
Block 10  January 27th
Block 11  February 10th
Block 12  February 24th
Block 13  March 10th
Block 14  March 24th
Block 15  April 7th
Block 16 and Setting   April 21st

Now what did you put in the Crock Pot for dinner?